Module 3

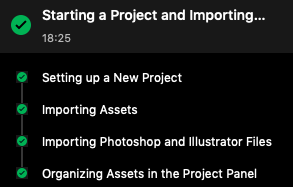
This module seemed to be on the shorter side, it did help teach me how to import files from Photoshop and Illustrator if I ever need or want to. Another thing I learned from the module was how to organize each asset in the project panel for a more neat and clean look and feel

Module 2 of Plural sight

the right side of my workspace
Top and bottom left of the workspace

During this module I was able to learn about the workspace and what it has to offer. I was also shown a preferred way to set up an exercise file, which is a file filled with each exercise and mini projects I will be doing alongside with the plural site instructor. On the 1st image it shows the library of assets and even effects.

Completed SouthPark Character

Completed Character


For this project I made myself as a southpark character in illustrator. To do this I had to use tools like, elispe tool, rectangle tool, rounded rectangle tool, pen tool, transparency, text tool and direct select tool. With the elispe tool I created the head, eyes, pupils, hands, and fingers. For the Rectangle tool I used it to create the arms. For the rounded rectangle tool I created the legs, torso and hat crease. For the pen tool I made the glasses, mouths and hat. lastly I used the text tool for the jacket and hat text.

Hippo Vector Art

Guilbeaux Hippo


In this project I created a vector art hippo using the pen tool, ellipse tool, Rectangle tool, Text too, and the direct selection tool. With the pen tool I was able to create the arms which may seem a bit oddly shaped. The ellipse tool was used to create the head, mouth, eyes, nose, and toes of the hippo. The rectangle tool was used to make the teeth and the sign along with the ears and the inside of the ears(Object Menu). Text tool was of course used to make the text that says “Hippo!”.

Personal Soda Can


For this project I used the same tools as the last one, but used different options and methods of such. For the text tool of course I used it to make the name of the soda, but also added a little line at the bottom, like a little motto or something. For the effects I used Bevel and Emboss to get the shine like effect on the top and bottom words. I used color overlay to create the colors on the words for a better look, so It wouldn’t look bland. I lastly used outer glow to create the little dark blue field around the letters for another effect for a better look.

3D Soda Can


For this project I used a multitude of tools including,  the effects, edited texture, move tool, and text tool. For the effects I used them mostly for the text which includes drop shadow, bevel and emboss, color overlay and outer glow, which allowed me to create a text that showed out more and would appeal to most people. For the text tool I made the words on the can to give it name, I used the algerian font to create the name as it was the one chosen from coach. For the edited texture I used it to put everything on the can so it actually has stuff on it instead of it being some blank canvas of a can. Lastly for the move tool, I used this to resize the images and other things needed onto the can for it to look “authentic”.

Clock animation

Guilbeaux-Clock


For this project I used a multitude of tools to complete this, ranging from Frame Animation, Drop shadow, and Eclipse tool. I used the eclipse tool to create the clock frame and body, also the point in the middle of the clock. Next I used text to create the numbers of the clock. I then used the Custom shape tool to create the arrow and the rectangle tool to make the little parts between the numbers. Last was frame animation to create what I have currently right now.

Design a site like this with WordPress.com
Get started